- Published 7 Sept 2023
- Last Modified 6 May 2024
- 15 min
A Complete Guide to Uninterruptible Power Supplies (UPS) by Eaton
Explore our helpful guide, brought to you by RS and Eaton, to discover everything you need to know about Uninterruptible Power Supply (UPS) devices. This comprehensive guide will provide you with the necessary information to understand and make the most of UPS devices.

Uninterruptible Power Supplies Explained
When there are problems with your power supply, the last thing you need is damage to your computers and memory-based tech hardware, adding to your frustration. At RS, we know that Uninterruptible Power Supplies (UPS) are a vital backup solution. That’s why we’ve partnered with the power management experts at Eaton to help you choose a UPS that'll keep your data and hardware safe at the most critical times.
What is an Uninterruptible Power Supply?

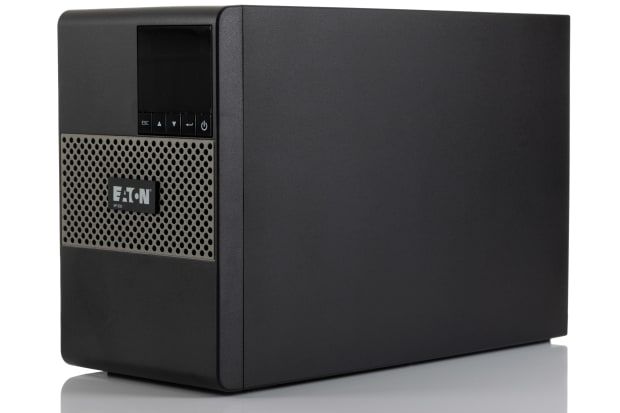
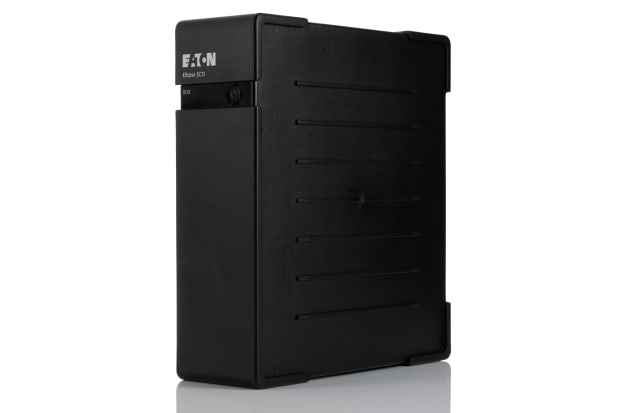
The core purpose of a UPS is to function as a constant secondary power source - effectively an on-demand, instant-switch battery backup - for computers, servers, data centres, and anywhere else you need to store information. A sudden loss of power can cause damage to the delicate hardware components in your PCs, so a quality UPS system is designed to protect them (and the data they rely on) in the event of a blackout, mains surge, or other unexpected power events.
Who uses Uninterruptible Power Supply units?
These devices are becoming increasingly popular as add-on peripherals for home and work PC setups, server and network environments, and many other hardware-critical computing applications. In these sorts of scenarios, uninterruptible power supplies can offer you additional peace of mind and an extra level of safety for both your hardware and your data.
To help you decide which UPS is right for you, this guide will explain:
- What does a UPS do?
- How do they protect equipment?
- What different types of UPS are available in today’s market?
A quick note on naming conventions…
In the context of tech hardware, the acronym UPS stands for uninterruptible power supply. So technically, the phrase ‘UPS power supply’ is a handy example of RAS syndrome (along with ‘PIN number’ and ‘LCD display’)! However, it remains a very commonly used term among customers and suppliers alike, and so for this guide, we’ll use both the standalone acronym and the longer version interchangeably.
How Does an Uninterruptible Power Supply Work?

As we noted earlier, a UPS works as an uninterruptible backup power source for your computer setups and other important hardware arrays in the event of an electrical disruption. These units are designed to provide a limited window of time in which you can perform a controlled shutdown of the device when the main power is no longer available. How does a UPS do this? Essentially, it collects and stores some of the power being drawn from the wall socket in its internal battery, with the remaining power being sent onto the computer as normal. When power flow suddenly stops for any reason, such as a power cut, the UPS instantly switches to sending out the stored backup power.
Keep in mind…
A UPS isn't designed to provide long-term backup use of connected devices for extended periods without power, or offer a battery-operated solution for continuing to work off-grid.
What’s an Uninterruptible Power Supply Made Up of?
A typical home or office UPS battery backup usually consists of a high-drain rechargeable power cell encased inside a small ‘smart’ unit. You’ll find these power supply units placed between the mains wall socket and the PC being powered, plugged into each by separate cables. Traditionally, the battery will most often be a lead-acid (VRLA) type, but ongoing advancements in lithium-ion technology mean that Li-ion cells are now becoming increasingly used as well.
UPS Battery Types
VRLA (Valve-Regulated Lead Acid)
A low-maintenance UPS lead-acid battery with a typical 5-year lifespan. It is valve-regulated, meaning it has built-in vent systems to control pressure release. It performs optimally in dry, temperature-controlled environments like centrally heated rooms in homes or offices.
Li-ion (Lithium Ion)
Li-ion batteries are compact, lightweight, and include built-in power management features. Although they have a higher upfront cost, their longer lifespan makes them economically advantageous over time.
VLA (‘Wet/Flooded Cell’)
VLA batteries are designed for specific applications and environments but are not widely available. While they require regular user maintenance and monitoring, they provide high reliability and stability. However, they can be potentially hazardous due to their chemical composition and are better suited for specific use cases like large-scale server centres.
Utilise the Power of UPS as Your Backup, and Say Goodbye to Data Loss and Hardware Damage…

UPS units are critical for protecting vulnerable (and often expensive) hardware components from physical or memory-based damage when they’re suddenly disconnected from the main power circuit. Even in the case of a total power-off event mid-transfer, a UPS can ensure vital data isn’t lost.
Why is this a big deal? Well, interruption of core processes can cause serious, irreparable physical damage, as well as massive data loss/error, which is why there is usually an approved disconnect process for almost any type of data transfer activity. In the worst-case scenarios, files can become unreadable by devices at both ends of the transfer if it’s interrupted. Corrupted data can sometimes still be salvaged by a specialised recovery technician (often at a high cost!), but if they’re unable to repair or retrieve it, then your data can be lost forever.
You may already have some of your important data backed up, but a UPS will also help you to protect the more integral background transfer processes that are constantly happening at both hardware and operating system levels any time a computer is powered on and running – many of which are key to the machine’s ability to function.
Types of Uninterruptible Power Supplies
Choosing the right uninterruptible power supply to suit your hardware setup and operating requirements best comes down to a few key variants. Read all about the different types and their features below:
Offline/Standby UPS
- This type ‘idles’ until needed. When the offline/standby UPS detects that power conditions are registering as normal, it effectively allows itself to be bypassed. The instant it detects a problem – usually within 5 milliseconds for most quality models and brands – the offline power supply switches over to its internal battery backup instead.
- This very slight ‘interruption’ is why they aren’t considered ‘true UPS’ devices by professional users. However, they tend to be a perfectly functional (and much more cost-effective) stand-in for most domestic desktop PC owners. They are only really seen as unsuitable in very critical applications where any risk of data or hardware loss is unacceptable.
Line-Interactive UPS
-
As the name suggests, the hybrid versions (which usually include the so-called ‘line-interactive’ UPS units) offer a middle ground between the online and offline types.
They offer various operating modes such as double conversion mode, economy mode, and active filter mode - and the hybrid UPS can detect which is most appropriate at any given moment. They can do this through the use of a power transformer system, which ensures a lower total power draw over a typical period of operation than an online version.
-
The line-interactive UPS is significantly more effective at monitoring, managing, and adjusting to flow variations during ‘brownouts’, which involve fluctuations in current rather than the total loss of power involved in a blackout and are far more common.
Hybrid models offer greatly increased long-term health of the UPS battery as it does not have to continually switch between supplying wholly mains or battery power.
Online Double Conversion UPS
- Often called a ‘true UPS’, this type of unit constantly filters, stores, and delivers electrical flow to your PC, even when conditions are normal. The term ‘online’ derives from this and not internet connectivity, as you might assume.
- Due to this, there is zero interruption when power loss occurs, and the supply of clean, stable power to your intended PC continues seamlessly. An online UPS, therefore, always performs the task it is designed to perform.
- Typically, the most costly type of uninterruptible power supply and provides the greatest security against unexpected current fluctuation or sudden power loss, making them a top-end option for most usage scenarios. The power draw and running costs are considerably higher. However, this type is ideal for certain critical roles and environments where any performance or data loss would be catastrophic.
What’s the Difference Between Single-Phase, Three-Phase, and Split-Phase Uninterruptible Power Supplies?
A phase refers to the number of electrical phases that an uninterruptible power supply receives and transmits. Three-phase power is the most efficient way of transporting electricity over long distances, so for larger power consumers, a three-phase UPS is required. For smaller power consumers such as office buildings and schools, power is converted to single-phase. A split-phase UPS can simultaneously provide 120V and 208V output for applications that use a mix of single-phase and three-phase equipment, protecting both.
Applications of UPS
Uninterruptible Power Supply plays a critical role across a diverse range of sectors globally. In Hong Kong, due to the region's high reliance on uninterrupted operations in both the commercial and industrial landscapes, UPS is indispensable for ensuring continuous power supply and preventing disruptions. Given the city's dense urban infrastructure and the premium on operational continuity, UPS applications are notably vital in data centres that support the vast digital economy and financial services sector, ensuring that data processing and transactions proceed without interruption. Some other sectors that UPS plays a key role include the following:
- Healthcare Facilities: Hospitals and clinics heavily depend on UPS systems to maintain life-saving equipment and critical patient care technologies operational during power disruptions. This includes everything from surgical equipment to patient monitoring systems, where even a brief power outage can have serious implications.
- Retail Sector: For businesses that require refrigeration systems, such as supermarkets and food distribution centres, UPSs are utilised to prevent spoilage during outages.
- Educational Institutions: Research facilities leverage UPS technology to prevent data loss and maintain the continuity of educational programs, especially those that rely on computer labs and online learning platforms.
In addition to these specific applications, UPS systems are also integral to maintaining the operations of telecommunications networks, public transportation systems, and emergency services in Hong Kong.
What Should I Consider When Buying a UPS?

The types of circuit protection you need, such as:
- Blackout
- Brownout
- Surge
- Over-voltage
- Under-voltage
- Deep discharge
- Harmonic distortion
- Frequency variation
The amount of UPS power you need i.e. the capacity, which will involve working out:
- How many devices you’re going to plug into it
- The combined power draw of those devices, in wattage
How long you need to be able to run those devices in the event of a blackout:
The UPS runtime depends entirely on the size of the battery and how many devices it is being asked to support. This is calculated by capacity and load. You’ll need, as a bare minimum, to know the amount of time needed to access your computer(s) and shut down properly
Other factors to consider:
- Appearance
- Physical size and form
- Positioning in the office/home for best access and safety
How to Install and Configure an Uninterruptible Power Supply
To ensure proper installation and configuration of an uninterruptible power supply, please follow the outlined steps below:
Step 1: Choosing the Right Location
The UPS should be placed in a cool, dry, and ventilated area to prevent overheating and ensure efficient operation. Avoid direct sunlight and excessive moisture.
Step 2: Connecting the UPS
Connect the UPS to the main power supply, and then connect your devices to the UPS. Ensure that the total power draw of the connected devices does not exceed the UPS's capacity.
Step 3: Battery Installation
If the UPS requires manual installation of the battery, carefully follow the manufacturer's instructions. Some models come with pre-installed batteries.
Step 4: Configuration
Power on the UPS and configure it according to your needs. This may include setting voltage thresholds, configuring alarm settings, and establishing a network connection for remote management if applicable.
Step 5: Testing
Perform a test to ensure the UPS switches to battery power smoothly during a power outage. This may involve simulating a power failure or using the UPS's built-in test function.
Step 6: Software Installation
If your UPS comes with management software, install it on your computer for advanced monitoring, management, and automatic safe shutdown of connected devices during a power outage.
Eaton UPS Solution

If you need an uninterruptible power supply that delivers steadfast power protection whilst saving on energy costs, Eaton can provide the perfect option. Eaton is the global leader in power management solutions, specialising in uninterruptible power supply systems, with a diverse product range tailored to various applications. These products ensure continuous power supply for critical infrastructure, with products such as SmartOnline UPS Systems equipped with hot-swappable power modules and detachable Power Distribution Units (PDUs), enabling optimal maintenance and improving productivity.
Eaton 9PX UPS
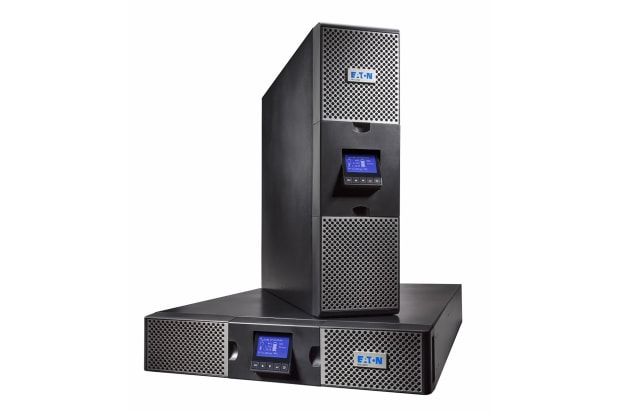
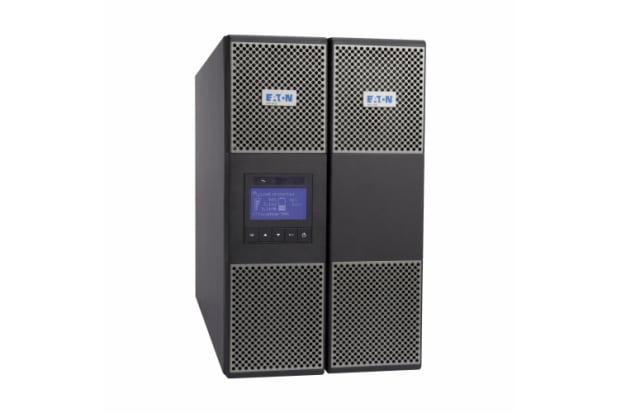
One of the ideal product choices that Eaton offers for reliable power protection is Eaton’s 9PX UPS. These units offer double conversion protection with 40% less energy usage, constantly monitoring your power conditions and regulating voltage and frequency. They come in a conveniently compact and versatile rack/tower form factor and are perfectly suited for use in small and medium data centres, IT rooms, and infrastructure.
Features of the 9PX UPS:
- Up to 95% efficiency in online double conversion mode and 98% in high-efficiency mode – the highest level in its class – for minimal energy and cooling costs
- The LCD (Liquid-Crystal Display) gives you clear information on the device’s status and measurements via a single-screen
- 0.9 power factor means that the 9PX delivers 28% more power than any UPS in its class
- Uses Eaton’s exclusive ABM battery management technology to extend battery life by up to 50% for a stronger and longer battery life
- Can accurately meter your energy consumption for cost-efficient power managementIncludes serial, USB and relay connectivity, as well as an extra slot for an optional card
FAQs
Popular UPS Brands
Eaton
Founded in the US in 1911, Eaton specialises in power management solutions, including Uninterruptible Power Supply (UPS). They offer a comprehensive range of UPS systems for various applications, providing reliable power backup to protect critical equipment and data centres.
APC
APC is renowned for its UPS systems and power protection products. They provide UPS solutions for homes, businesses, and data centres, ensuring uninterrupted power supply during outages. APC's UPS systems are widely recognised for their reliability and efficiency.
Phoenix Contact
Phoenix Contact is a German brand that offers a diverse range of industrial automation and electrical engineering solutions, including UPS devices. Their UPS products are specifically designed for industrial applications, delivering reliable power backup to protect sensitive equipment and processes.